6
Chapter 6
Essential Hardware
A thorough knowledge of the hardware of a 3D printer is essential if you want to make the most of this exciting new technology. Both the hardware and the software work you deploy work in conjunction … so having insufficient knowledge of the hardware means you’re missing half the equation!
It can be quite difficult to fully understand the hardware of 3D printers; however, the purpose of the main components is not as difficult to comprehend as it may seem initially. This chapter will briefly discuss how a 3D printer works, and will go on to reveal the major components that make up a basic 3D printer.
How A 3D Printer Works
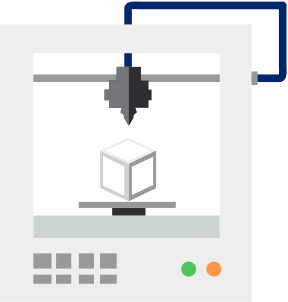
By now you should know that a 3D printer creates objects by adding material layer by layer until the object is completed. A printer consists of a frame and features three axes:
- X-axis (left to right movement)
- Y-axis (front to back movement)
- Z-axis (up and down movement)
A part called an extruder is installed on the X-axis and its function is to feed the material that is used to create an object. The lowest part of the extruder itself is called the extruder head – this is the part where the filament is melted and ‘extruded’ from a tiny hole that has a diameter of no more than a millimeter.
A part called an extruder is installed on the X-axis and its function is to feed the material that is used to create an object. The lowest part of the extruder itself is called the extruder head – this is the part where the filament is melted and ‘extruded’ from a tiny hole that has a diameter of no more than a millimeter.
The Anatomy of a 3D Printer
You don’t necessarily have to learn about each and every individual part of a 3D printer in order to use it. However, learning about the basic hardware and construction of one can help you if you ever have to troubleshoot a problem (and trust us … you will have to fix your 3D printer, sooner rather than later!) This knowledge will also be of a great help when you go out to actually buy a printer.
There are various types and methods employed by 3D printers to create objects and we have already discussed them in the previous chapters of this book. In this chapter, our emphasis will be on Fused Deposition Modeling technique that is the most common among desktop 3D printers used at home. This method can be considered to be the same as the ‘glue-gun’ method. The glue-gun method consists of heating up a filament to a point where it melts – this melting filament is then placed in thin layers and the object is created layer-by-layer.
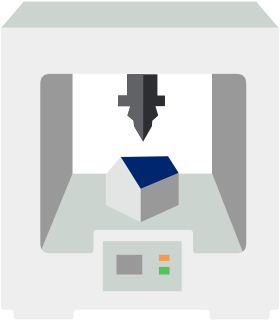
Print Bed
The print bed is the area where the objects are created layer by layer by the printer. Based on the type of filament you are using, the print bed itself may be heated. You can cover a non-heated bed in painter’s tape.
As for heated print beds, it is important to keep the print bed warm during the whole layering process in order to prevent warping. Temperatures between 40 degrees to 110 degrees Celsius are maintained during the entire printing process.
There are some printers that can reach extremely hot temperatures, and extra care should be taken if there are children around. You’ll quickly learn not to touch a warmed-up print bed!
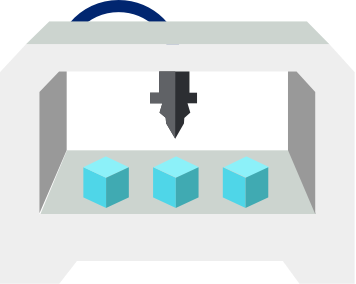
Extruder
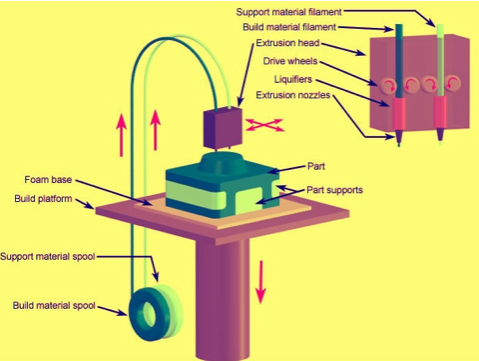
The extruder is often considered to be the component from where the plastic filament extrudes. However, this isn’t entirely true; the extruder is a part that is responsible for pulling and feeding the filament to a part called the hot end.
A depiction of the various parts of a hot endTypically, extruders are integrated within hot ends. In other cases, they may be located away from the hot end from where they push the filament to the hot end through a tube called the Bowden Cable. A printer with a dual extruder can print using two different colors and materials at the same time. This does come at an extra cost because an extra extruder and a hot end is required.
Hot End
The Hot End in a 3D printer comprises of a heater, a temperature sensor and an extrusion tip through which the filament is fed. Just as their name implies, they can get extremely hot and should never be handled directly (we mean this … don’t fiddle around with the hot end if you value your fingers!) There are holes in the nozzle that range in size: between 0.2 mm and 0.8 mm.
The smaller the nozzle of the hot end, the finer the print will be; however, the time taken to print the object will also be greater.
Plastic Filament
While the plastic filament is not a component of the printer itself, it is a consumable that is vital for its operation. Just as you couldn’t print on an inkjet without cartridges, you’ll be stuffed without your 3D printer filament. There a quite a few types of filaments available for use by 3D printers. The choice is generally limited to two major types when it comes to home 3D printers: ABS and PLA. We will talk about the two types in detail later on in the chapter.
Different Types of Beginner-Friendly Printers
In this section, we will discuss the advantages and disadvantages of each type of 3D printer, along with some other useful information that will help you decide the kind of printer you should choose.
If you will recall, the three types of printers are:
- Fused Deposition Modeling (FDM) Printers
- Stereolithography (SLA) Printers
- Laser Sintering (SLS) Printers
Fused Deposition Modeling (FDM) Printers
Fused Deposition Modeling is probably the most common type of additive manufacturing process, and is used by the majority of desktop 3D printers that you are likely to encounter. Filament is fed into the extruder of FDM printers, where it is heated to a temperature high enough to melt it. This melted filament is then extrudes from the nozzles to create an object each layer at a time.
Advantages of FDM Printers:
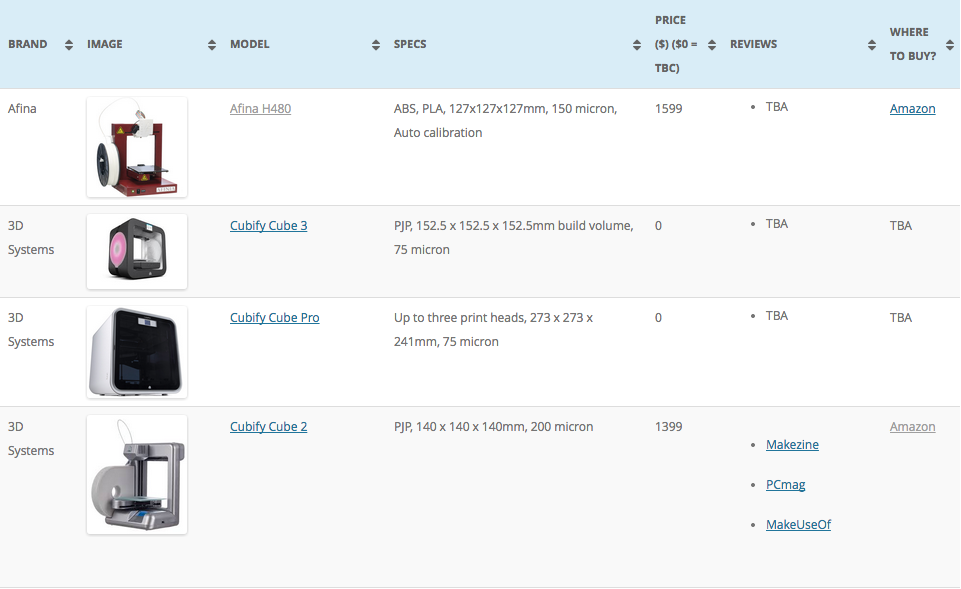
- Comparatively, these 3D printers are the cheapest and can be bought between $1000 and $5000.
- The filament used by these printers is also affordable.
- They can use a large variety of materials.
- They can be easily maintained and parts can also be replaced conveniently.
- They can print objects quite fast.
Disadvantages of FDM Printers:
- The nozzles can frequently clog
- The supports can be problematic to clean up
- The individual layers can be visible in the end product (striping)
The following materials can be used to create objects using an FDM Printer:
- PLA Plastic
- ABS Plastic
- Wood Filament
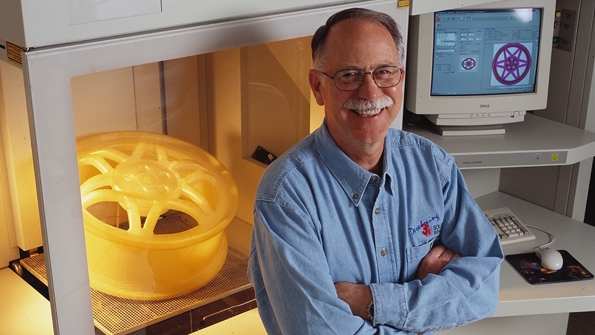
Stereolithography (SLA) Printers
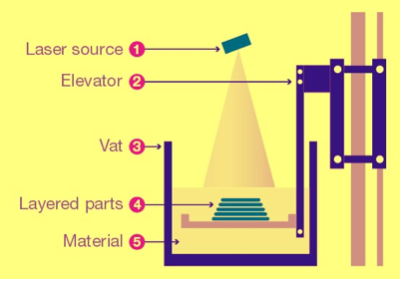
Stereolithography is probably the oldest additive manufacturing process. These 3D printers contain a pool of liquid resin which is hardened by a beam of ultra-violet (UV) light. As soon as a layer has been formed, the base moves to allow for the creation of another layer, and thus the process continues until the whole object has been created.
This 3D printing method is ideal for those who want great detail in their final products. The cost of these printers can vary between $3000 and $7000.
Advantages of SLA Printers:
- The final products can contain great detail down to 25 microns (this is thinner than a sheet of paper).
- The surface of the objects created using this method is smooth.
- This technique is great for casting and molding as well as for creating models.
Disadvantages of SLA Printers:
- The nozzles can frequently clog
- The use of liquid resin can be quite messy
- The materials that can be used are limited.
- The materials used are more brittle.
- These printers are generally more expensive than FDM printers.
- SLA printers can only use liquid resin.
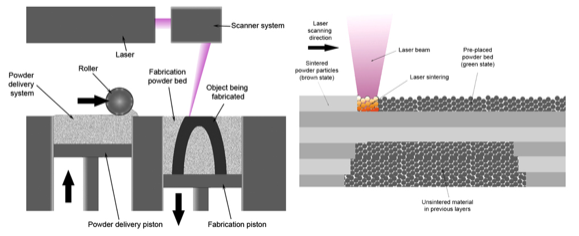
Selective Laser Sintering (SLS) Printers
The Selective Laser Sintering technique works in remarkably similar ways to that of SLA; however, a powder is used instead of a liquid resin. A laser is used to heat up the powder. Once the object has been created, the rest of the powder can be removed leaving only the solid object.
These printers are currently extremely expensive, and cost over $50,000. Clearly, this is not going to be a viable choice unless you have just won the lottery! Nonetheless, if you wish to have a model printed using this method, you can use numerous online printing services.
Advantages of SLS Printers:
- They can provide detail down to 16 microns.
- No support structures are required for the object being printed.
- Working mechanical parts can be created without a requirement for any assembly.
Disadvantages of SLS Printers:
- It takes a little effort to remove the powder after an object has been printed.
- Currently there are no desktop models of SLS printers.
The following materials can be used to create objects using an SLS Printer:
- Aluminum
- Nylon Plastic
- Sandstone
- Silver
- Steel
Filament Types – PLA vs. ABS
There are a number of different materials available for use in 3D printers, ranging from numerous metals, wood, plastic to … wait for it … chocolate! Yet, when it comes to plastic filaments, the two most common types of plastic filaments are PLA and ABS.
PLA, or Polylactic Acid, is a type of biodegradable plastic with many features that make it desirable for 3D printing. For example, it does not give-off any fumes, nor does it warp as much as ABS does. When it comes to the appearance, it is also quite shiny and products made out of PLA have a sleek appearance. It is harder than ABS, yet more brittle. This does not at all mean that it will break easily – on the contrary, PLA is actually extremely strong, and it is far more likely to snap rather than bend as a result of any deformation.
ABS, or Acrylonitrile Butadiene Styrene, is a plastic made from petroleum-based sources. It has a melting point much higher than PLA. It is quite strong and is often used to create toys such as Lego. Compared to PLA, objects made from this filament are more likely to bend than snap.
This section will discuss in detail the similarities between these two filament types, as well as the major differences between them. We will also go on to talk about difference in filament thickness. The advantages and disadvantages of each filament will also be described to help you choose the ideal material for your projects.
The Common Ground
ABS and PLA are both known as thermoplastics. Whenever they are heated, they become soft and can be molded, returning to solid when cooled. This process can be carried out repeatedly, and these properties are precisely what has made them so popular.
There are a great number of thermoplastics available; only a very few are used for 3D printing purposes. In order for a material to be viable for use in 3D printing, it has to pass three tests:
- Initial Extrusion into Plastic Filament
- Second Extrusion and Trace-binding during 3D Printing
- End Use Application
In order to be able to pass the three tests, a material must be first easily formed into a raw 3D printer feedstock called the plastic filament. These filaments come in a reel.
Secondly, the material should be able to form accurate parts of the products being created using 3D printers.
Last but not least, the properties of the plastic must have desirable characteristics related to its strength, gloss, durability as well as numerous other qualities.
ABS and PLA, as well as numerous other thermoplastics can pass the first test in a breeze. It’s just a question of the cost and the time required to turn the base plastic resin into a high quality plastic filament.
Storage
Thermoplastics such as ABS and PLA work best if, before being used (or when being stored for an extended period of time), they are sealed to prevent them from absorbing moisture from the air.
However, this does not imply that the filament will necessarily be spoiled if you let the reel of your filament sit around for a week or so before you use it. Still, extended exposure to the atmosphere can have detrimental effects on the quality of the material as well as the end product.
The filament comes wrapped up in plastic to prevent absorption of moistureHere is a comparison of the effects of storing ABS and PLA:
ABS – If ABS is exposed to the atmosphere and it absorbs unacceptable amounts of moisture, then it will tend to bubble and gush from the nozzle tip when being used to print an object. This will lead to a reduced visual quality, accuracy, strength and will be more likely to clog the nozzle. By using a source of heat such as a food dehydrator, you can easily dry ABS prior to use.
PLA – PLA reacts in different ways when exposed to moisture. In addition to forming bubbles and gushing from the nozzle during printing process, a slight discoloration and numerous other changes in its properties will also be seen.
At high temperatures, PLA is known to react with water and this can lead to depolymerization. Depolymerization is a process in which a material undergoes decomposition into simpler compounds.
You can also dry PLA using a food dehydrator, but keep in mind that this can lead to a change in the crystallinity ratio of the material and will probably alter extrusion characteristics. Nonetheless, this isn’t a major problem for most of the 3D printers out there.
Smell
ABS – When ABS is heated, a notable odor of hot plastic is pretty evident. For some, this is nothing more than a nuisance, while there are some people who do not even notice it. Regardless of whether you notice the smell or not, it is imperative that you ensure proper ventilation of the room where ABS is being used. Also, make sure that the ABS you use is free of contaminants. A reliable extruder also plays an important role as heating the material to the proper temperature goes a long way in controlling the smell.
PLA – Due to the fact that PLA is made from sugar, it gives off a semi-sweet odor equal to that of cooking oil when heated. It definitely won’t bring back memories of those delicious home-cooked meals; however, some consider its odour to be better than that given off by ABS.
Part Accuracy
ABS and PLA both have characteristics that allow them to create dimensionally-accurate parts and products. Still, the following points are worth mentioning when it comes to discussing accuracy of parts.
ABS – One of the major challenges involving use of ABS is the upward curling of the surface that is in direct contact with your printer’s print bed. By heating up the print bed and by making sure that the bed is clean, flat and smooth, you can really help to eliminate this issue. Some people find it better to apply a number of solutions including ABS/Acetone mixture or simple hair spray onto the print surface prior to printing. At 3D Insider we have experimented with hair spray on the print bed with some success (just remember that hair spray is highly flammable!)
Certain features such as sharp corners usually end up being round. A small fan can be used to cool the area around the nozzle to improve such corners; however, excessive cooling can lead to a reduction in the adhesion between the layers, and may eventually cause the final product to crack.
PLA – PLA warps less than ABS. This is exactly why it can be used to print objects without the need of a heated bed. If cooled actively, PLA can be used to create sharper details including sharp corners without the material cracking or warping. The increased airflow can also assist by strengthening the object by binding the layers strongly together.
General Material Properties
Regardless of how accurate a certain part is made, it must be able to perform its intended functions.
ABS – ABS can take numerous forms and can also be engineered to have various properties. In essence, it is a strong plastic with moderate flexibility. Before colors are added to ABS, it milky-beige. The mild flexibility of the material makes it easy for it to be sanded and machined. Also, it is much easier to recycle as compared to PLA.
Engineers usually prefer ABS due to its high strength, flexibility and machinability.
PLA – The origin of PLA includes sugar-beets, corn and potatoes. This is why PLA is thought of as being more environmental friendly than ABS. It is commonly used to package food and to make containers foodstuff. In its original form, it is transparent but can be colored to varying degrees of opacity and translucency.
It is much stronger than ABS as well as rigid. Objects printed using PLA carry a glossy look and are smooth to the touch. Nonetheless, it is slightly more complicated to work with due to its complex interlocking assembly and pin-joints.
Thickness of the Filament
ABS and PLA filaments come in two different diameters: 1.75 mm and 3 mm
Each printer (each extruder, to be more precise), is designed to work with a certain thickness of filament. You will have to see the specifications of your printer to see which filament you can use with your particular model of 3D printer.
Some printers are designed to use proprietary diameters that may be slightly different from the standard thickness. If you haven’t bought a printer yet, then you can choose a printer that supports the standard diameters so that you will have more options when it comes to choosing a plastic filament supplier (more options in terms of color, material, etc).
The diameters of the filaments may vary slightly from one manufacturer to another. However, if a filament is labeled as 3 mm, then it must not exceed that value; it can, however, be slightly less than 3 mm (say, 2.88 mm).
Some filament can also have lumps and neck downs in them that run for a few centimeters. Lumps are those sections where the diameter exceeds the rating. On the other hand, neck-downs are those regions where the diameter is less than what it’s supposed to be. Jamming and stripping can result from this; nonetheless, such instances are rare, especially if the filament being used has been manufactured by a reliable company. It’s generally advisable to avoid “dirt cheap” filament for this reason.
Conclusion
You should carefully weigh the advantages and disadvantages of each of the materials before you settle for one. Think about what kind of objects you need to print, and what kind of applications they are required to fulfil.
Some say PLA is the best material for beginners to start with, and you may want to try it out to see whether that’s true. However, we started with ABS and did not find it overly difficult! You can always switch materials down the lane.